This article explains the optimal workflow when working with the BCF-server between Solibri and Catenda Hub (previously Bimsync).
STEP 1 – Start with connecting with your Catenda Hub (previously Bimsync) project (see the article here). The reason we recommend connecting with Catenda Hub (previously Bimsync) before starting the clash detection is because you will have all the values (statuses, types, labels etc.) at hand when creating the issues in Solibri. And you will not need to do any value conversion before syncing.
STEP 2 – When connected, start by running your clash detection in Solibri and create a presentation.
There are several ways of creating a presentation in Solibri, but here is the best type for communicating with Catenda Hub (previously Bimsync).
- Run the check with your ruleset.
- Find an issue you want to add to your presentation.
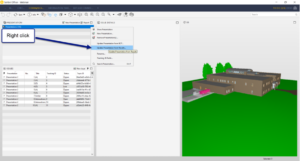
- Instead of going to communication and adding the slide to your presentation there, right click on the issue in the checking results and press the button “Add slide”. By doing it this way, all objects in that issue will automatically be included in the issue in Catenda Hub (previously Bimsync) and will be easier to locate. This, combined with “hide others”, makes others translucent in Catenda Hub (previously Bimsync), and is a good way of never losing track of which objects are included in the issues.
When creating a slide this way, you will still get the same type of issue layout as in communication, where you can add a title, add a description, add extra pictures and comments. The same goes for assigning people to the issue.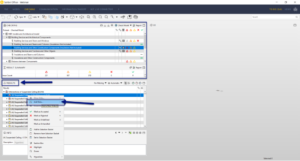
- When you are done with your checking, go to communication and create a presentation from “checking results”. Then all the issues you created in the checking results will appear in your new presentation. If you want to add these slides to an existing presentation you can right-click on that presentation and press “update presentation from results”, this way all the slides created in results will be included in that presentation.
STEP 3 – Now, after you have created the presentation you can start syncing with Catenda Hub (previously Bimsync).
The reason we do not jump straight to synchronization from checking is that it is always beneficial to put it into a presentation first to go through the results and see if there is something missing or something that can be excluded, before syncing with Catenda Hub (previously Bimsync).
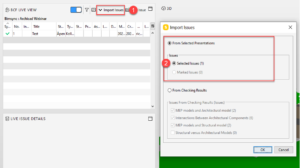
When you have finished the presentation, you go to the BCF Live Connector tab, there you press “Import Issues” to get the menu where you could either choose to import the issues directly from your checking results, or from a presentation. When you have selected the right one you press “OK”, and if you did not connect to Catenda Hub (previously Bimsync) before starting the clash detection a new popup will appear.
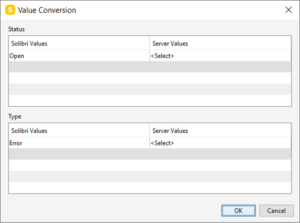
In the Value Conversion field you select what values you want to match from Solibri to Catenda Hub (previously Bimsync). You might use different values in Bimsync than in Solibri and this is where you convert them.
If you connected to the Catenda Hub (previously Bimsync) project before starting the clash detection, you would have the values from Catenda Hub (previously Bimsync) at hand when creating the issues and you would not have to do the value conversion before syncing. So if this does not show up for you, fear not, you have done nothing wrong.
Press “OK”, and the sync will start.
How to solve design issues faster in Solibri with Catenda Hub (previously Bimsync)? Watch the webinar recording here.
How to master your BIM Workflow? Watch the webinar recording here.
Rickard Ekholdt, Regional Manager Nordics Market at Catenda.
